Samsung Note 9 Teardown! – Is there Water inside?`
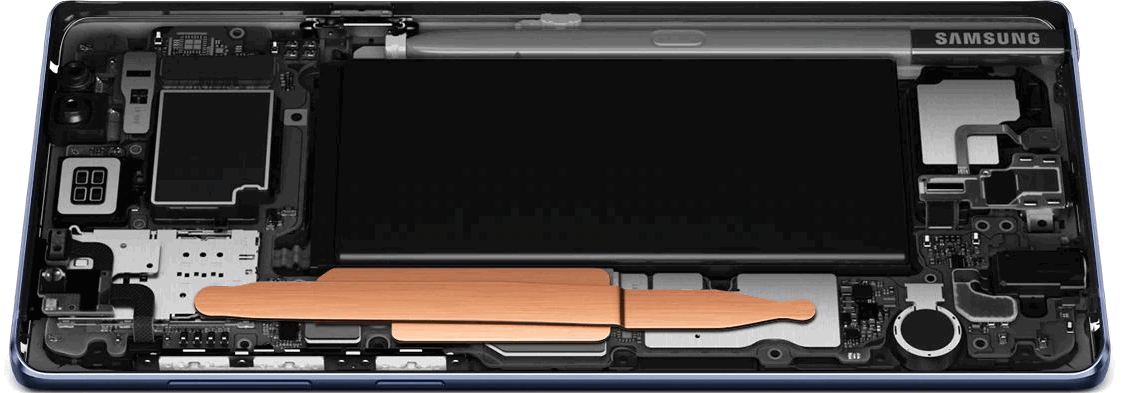
Samsung Galaxy Note 9 cooling system:
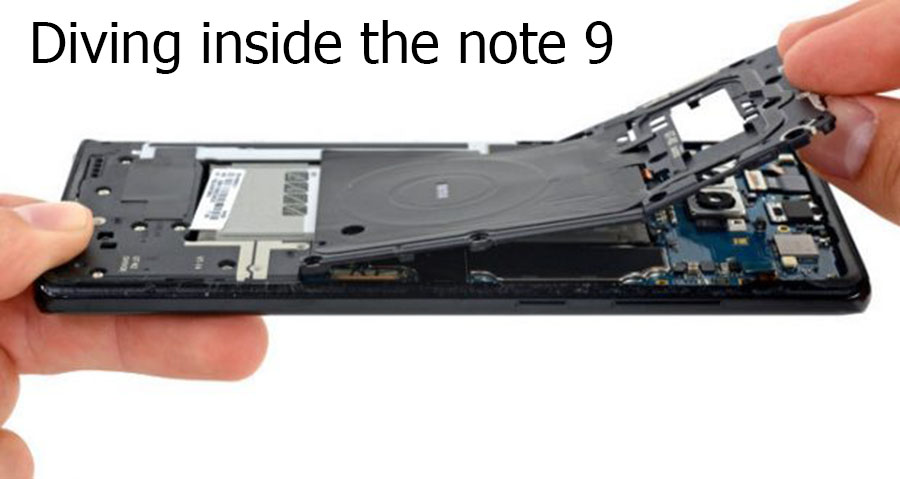
it’s time to tear down the brand new Galaxy Note 9 and take an inside look at that water carbon. we want to make sure of some announced features, and see if really Samsung keep being honest and realistic with their customer.
so let’s get started on ’’!
the first step lets pullover this back cover using the heat gun, and heat dissipation system normally. let’s get started getting inside.
watertight bones are something you would expect when it comes to opening a water-resistant device. it is a good and functional technology because it gives more freedom, and protection to your smartphone. but if you are a tech. passionate, and you want to open your phone, most probably you’ll not be a super fan of this.
anyway, heat will be your best friend for softening the adhesive holding the back glass layer to the metal frame of the phone this is much harder than it looks the phone is trying to hold itself together while simultaneously melting my fingers off.
use a bit of card stock around the curved glass corners, to avoid the pressure. a metal tool would inflict once the adhesive is completely cuffed from around the edges of the glass.

the whole thing pulls away from the foam. body still attached is the fingerprint scanner ribbon, but it looks like I didn’t Nick it with any of my tools so we should be okay”. it’s the same solid slab of black glass we’ve come to expect from Samsung, so a clear phone is definitely an option, but we’ll save that for another day.
the teardown gets easier at this point, with eleven normal Phillips head screws surrounding the top plastics, and that wireless charging pad.

once those screws are out and set off to the side in an organized fashion, of course, I can pull away the wireless charging from the phone, and we get a close-up look at the golden contact pads it uses to transfer power and communicate with the motherboard, as well as what I believe, is the battery temperature sensing Niblett in the top right corner.
I’ll unplug the battery from the motherboard, so we don’t have to worry about anything shorting out and then we can mosey on down to the seven screws holding the bottom plastics over.
the charging port pulling that off reveals a large loudspeaker along, with this gold contact pads. the water damage indicator and another foam ball pit for ants like we saw inside of the oneplus six. these foam balls realistically have something to do with sound dampening, but I honestly still have no idea this time around.
World Best Smartphone 2018-2019
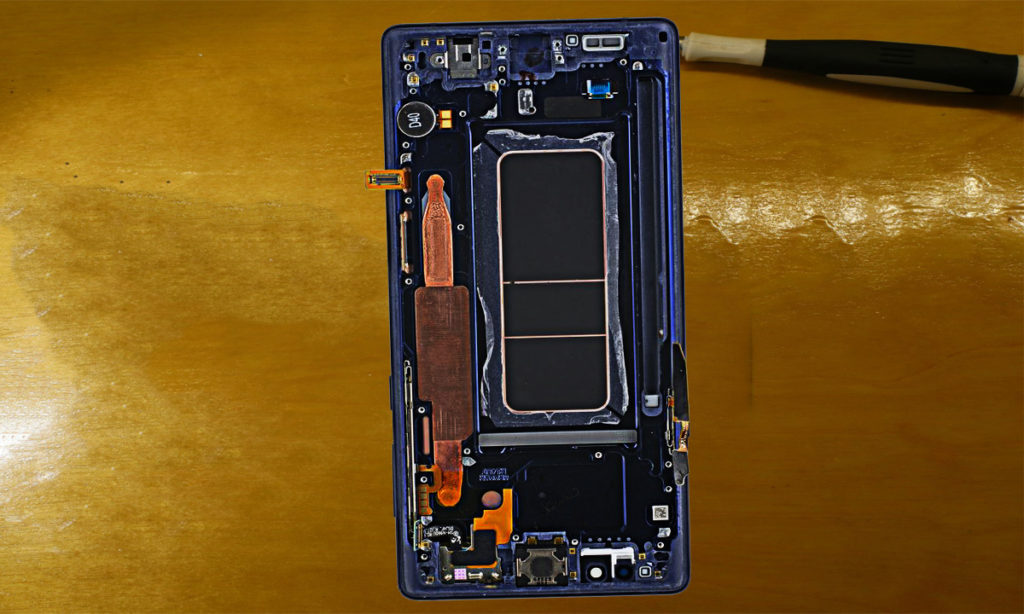
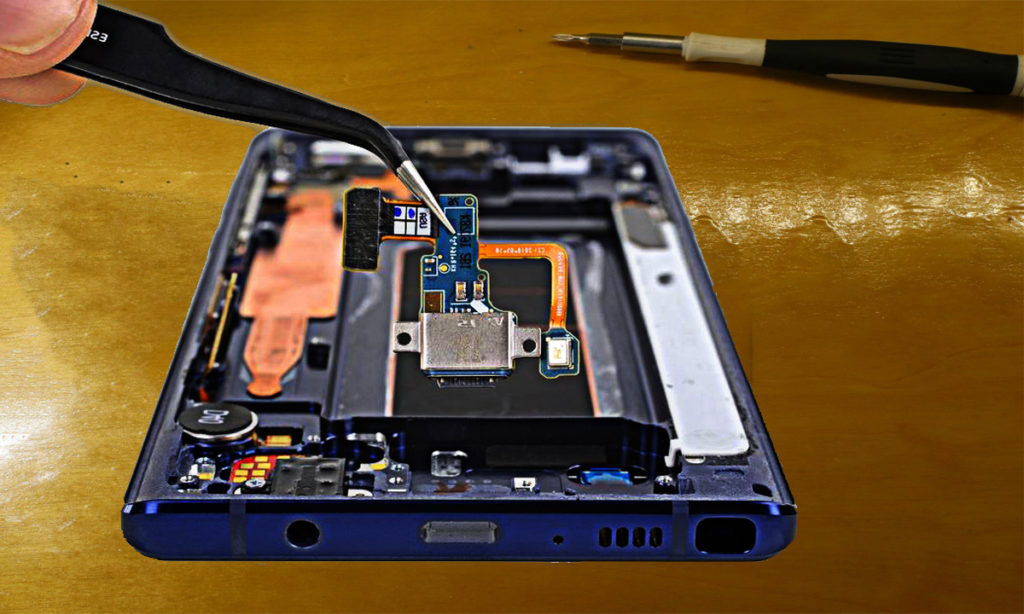
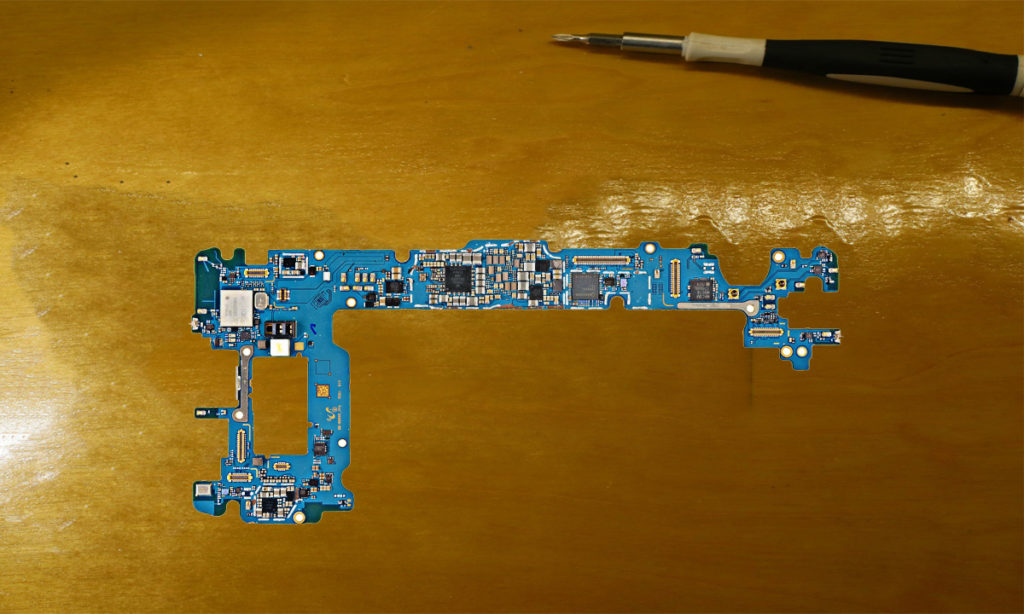
the note 9s motherboard has three screws holding it to the frame, two screws down at the bottom, and one screw up at the top left then it can start unplugging the ribbons like little Legos. the front sensor ribbon and iris scanner ribbon up at the top, and the charging port ribbon down at the bottom of the motherboard along, with the larger screen ribbons on the right side, and of course the SIM, and SD card tray is also holding the mother in place, so still needs to be removed.
pulling the motherboard out of the frame is easy enough just navigating around all the ribbons we unplugged, and finally, we got our first look at the incredibly large copper heatsink.
we’ll commence the autopsy on that guy in just a second, but first we’ll remove the front-facing 8 megapixel camera, no image stabilizing on this the dual rear cameras though should both have it the whole unit, is very well adhered to the motherboard Samsung definitely doesn’t want these moving around, but once it’s off each lens does indeed have its own Hardware stabilizing built-in the 12 megapixels variable aperture camera which you can see opening and closing, if you followed the steps on this teardown article.
it has a physical aperture mechanism, which changes automatically to let in more or less light as the camera needs it. it’s also Hardware stabilized the 2 x telephoto zoom lens camera on the left, and it also optically stabilized.
this is definitely the most high-tech complex system of cameras in any smartphone on the market right now. we’ll plug all three cameras back into place so that they’ll still function if the phone survives the rest of this teardown.
The charging port has changed a bit this year, with the note 9 it’s quite a bit smaller than the previous note 8. all that’s included on the itty bitty board is the quick charging USB C docking port, with its water-resistant rubber ring around the tip, as well as a tiny little microphone replacement charging ports for last year’s Note 8 are only about 12USD right now.
So, it definitely pays to know, how to fix your phone down at the bottom of the phone, we have our normal water-resistant mesh for the loudspeaker. the headphone jack and our circular vibration motor, with its golden contact pads.
there is one more water damage indicator up at the top of the phone, visible through the SIM, and SD card tray when it’s pulled out. and of course, we have the gigantic earpiece speaker.
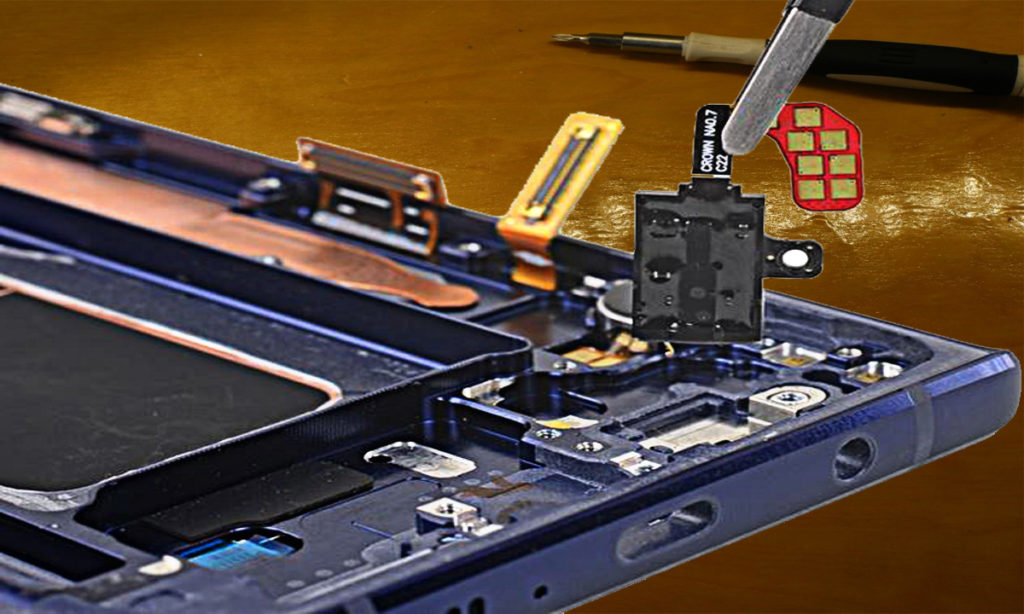
one question I get surprisingly often, is what happens if I stick my SIM card tool in the wrong hole?
The answer to that is nothing happens.
as you can see from inside the phone, the water-resistant mesh and corresponding microphone hardware, are off at an angle to the hole itself. so no matter how far you stick your tool inside, it won’t damage or puncture anything important. thumbs up for that the only things inside the phone we have left to remove are the large 4000 milliamp battery, and the large water carbon heat dissipation system.
Samsung has added enough adhesive under this battery, to glue an elephant to the ceiling. it’s a ridiculous amount even bending my metal right tools during the removal, there are no magical pull-tabs either like we’ve seen in some of the iPhones.
the battery does finally come out, though if you remember the note7 battery the one that kept exploding, it was 5000 milliamp. last year’s note it dropped down to 3300 milliamps, but this year Samsung has regained its confidence and is rocking a massive 4000 milliamp battery. hopefully, it works out
now for that water carbon heat dissipation system, it’s definitely one of the larger heat pipes that we’ve seen inside of a cell phone. way bigger than last year’s Note 8, and looks to be about the same size as the massive heat pipe we found inside the gaming razor phone.
- OTHER ARTICLES TO READ:
- How To Make Smartphone Battery Life Last Longer
- 11 Useful Cell Phone Secret Codes | You didn’t know they’re existed
the only way we can truly understand this thing is with an autopsy which means, it needs to come out of the phone under the copper heatsink. is the same adhesive Samsung slathered under the battery, once it’s out we see that the cylindrical heat pipe itself has a large rectangular copper pad over the top of it.
remember copper itself is a fantastic thermally efficient conductor, so a solid copper plate is useful next to a superhot processor. but that doesn’t give us any insight into the water carbon stuff Samsung was mentioning supposedly inside this vacuum sealed.
One tube is liquid usually a super small amount and realistically, because of that mint amount the moment it’s opened up, any liquid or vapor will evaporate instantly. the tube itself is hollow and slicing it open reveals a copper wick inside.
the mesh screen inside this tube acts as a wick, to help transport the small amount of liquid from the hot end of the pipe to the cool end of the pipe during high-temperature loads like gaming or texting an angry girlfriend.
it’s a capillary weave of copper, you could say the whole thing looks very much like a normal heat pipe, just like we’ve seen in other smartphones. so I’m not sure where the carbon part comes into play, but at this point, it would just be nitpicking the advertising jargon.
either way, this thing is massive and it’s copper, so it’s pretty safe to assume that it’s going to do its job of cooling down the phone during long fortnight gaming sessions.

everything should still function just fine without copper contraption. I won’t be winning any of those fortnight chicken dinners or whatever, because it might throttle a bit.
but let’s see if the phone still turns on, the battery is back into place along with the small charging port, and its two screws and then, of course, the motherboard can settle down taking special care enough to pinch the ribbon cables.
underneath the board every Lego connection is on top, this time around and surprisingly has no wire cables, just plug the screen ribbons along the right side, and the charging port ribbon down at the bottom along with the front sensors. put the three motherboard screws back into place before plugging in the battery, and then the loudspeaker plastics and the wireless charging plastics can be set into place with the eight-pin screws holding everything together.
- MORE ARTICLE TO READ:
- apple-watch S3 – FULL detailed Review
- Best Smart Watch To Make Calls
- best smartwatch to track sleep
the back glass with a short fingerprint scanner is kind of tricky, but after that’s plugged in the whole thing turns on, and you’re good to go.
Samsung has been doing some pretty innovative stuff with the note 9, this was definitely a fun tear down the cameras, and heat pipe was incredibly interesting from the inside.
Trending articles now”


1 COMMENTS